Lead Hub — Find People and Upload Lists
Find Leads (B2B search) and Upload (CSV/XLSX), filters, Add to Project, mapping dialogs, and templates.
Lead Hub — Find People and Upload Lists
The Lead Hub is your one-stop shop for bringing prospects into your projects. Two modes:
- Find Leads — search for new people or companies via the B2B discovery backend.
- Upload — bring your own CSV or XLSX of leads and add them to a project.
Where to Find It
Sidebar → Leads → Lead Hub, or the URL /lead-hub. The page has two tabs at the top: Find Leads and Upload.
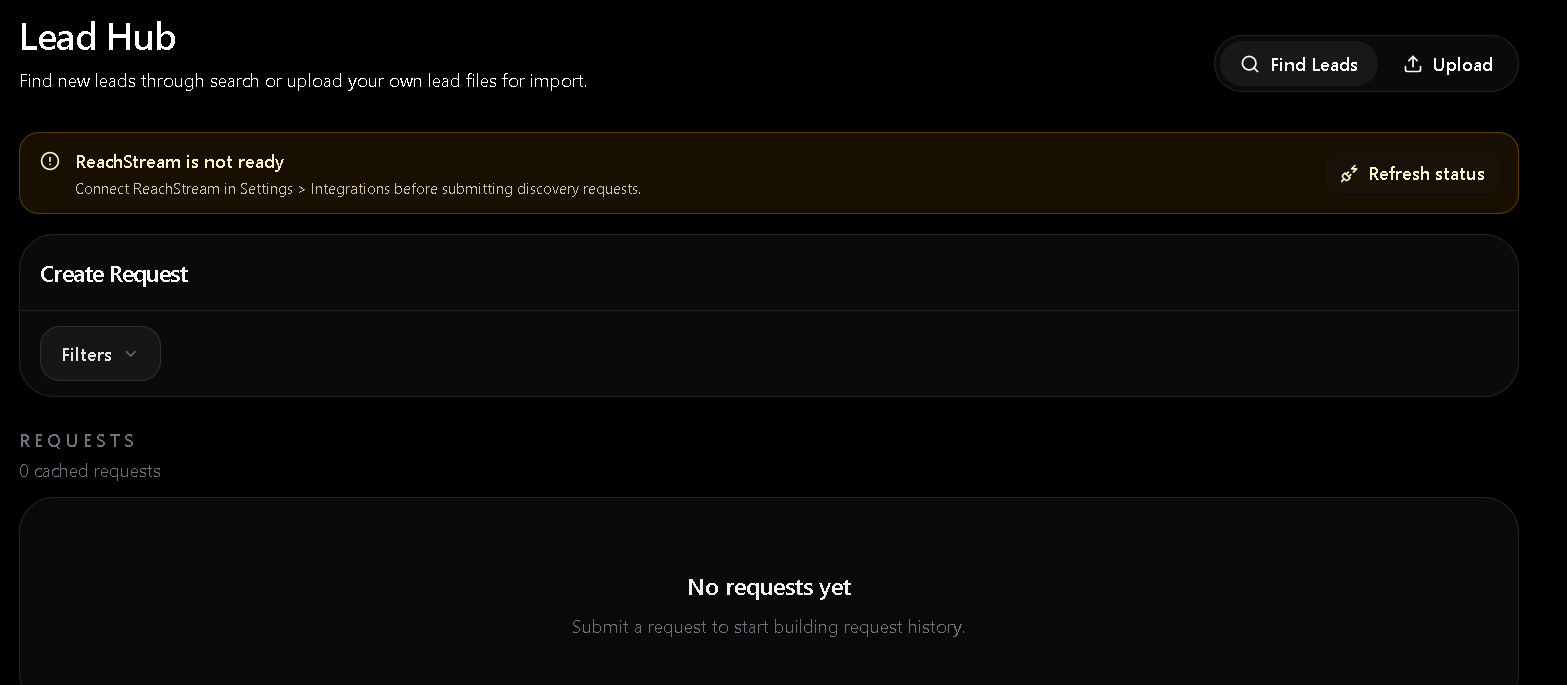
Find Leads Tab
The search interface has three areas:
- Top bar — mode toggle (People / Companies), search button, result count.
- Left panel — dynamic filters (industry, location, title, company size, etc.).
- Main panel — paginated results table.
Filters
Filters are loaded dynamically from the discovery backend. The shape depends on the mode:
Results Table
The result table is paginated. Each row has:
- A checkbox (for bulk select)
- A name (or company name)
- Key fields (title, company, location, etc.)
- An actions menu (View, Add to project, Copy email)
Adding to a Project
When you have rows selected, click Add To. A dropdown appears:
- Pick a Space from your list.
- Pick a Project within that space.
- Click Add.
The selected leads are added as Customers in the chosen project. They appear in:
- The project's Customers tab in the side panel
- The
/spaces/customerspage (filtered to that project) - The worker's memory for that project (so it can reference them in chat)
The worker can do this for you. In chat: "Find 10 marketing directors at SaaS companies in London and add them to my Q4 outreach project." The worker drives the same UI flow programmatically.
Background Refresh & Caching
The Find Leads panel auto-refreshes results every 5 seconds while you have it open (to keep the data fresh). It also caches the last request in localStorage so reloading the page doesn't lose your filters and results.
A small "Last refreshed" timestamp appears at the top of the table.
CSV Download
Click the Download CSV icon (top right of the table) to export the current result set to a CSV file. The CSV includes the columns you see plus any hidden detail columns.
Why? Common workflow: search → export → import into another tool (your CRM, a spreadsheet, etc.).
Upload Tab
Switch to the Upload tab to bring your own leads. Supported formats:
- CSV (
.csv) - Excel (
.xlsx,.xls)
The Upload Mapping Dialog
The dialog has three sections:
After Mapping
Once the mapping is set:
- Click Continue.
- The system validates: required fields are mapped, at least one row has data.
- You can preview the first 5 mapped rows in a confirmation step.
- Pick the Space and Project to add the leads to (same flow as Find Leads → Add To).
- Click Add to project.
The leads are added as Customers in the chosen project.
Lead State Machine
Behind the scenes, each lead goes through several states:
discovered → (selected) → (added to project) → (in project customer list)
- discovered — found by a search.
- selected — checked by the user.
- added — saved to a project's customers.
The selection and project-add steps are separate. You can select rows, then add some later, and re-find the same leads without re-searching (the panel caches them in localStorage).
Refresh Behavior
- The Find Leads panel auto-refreshes every 5 seconds while open. The result count and timestamps update in place.
- The Upload tab does not auto-refresh.
- Filters are debounced 300ms before triggering a request.
When the Provider is Down
If the ReachStream B2B provider is unavailable, the Find Leads panel shows an error banner:
- "We're having trouble reaching the discovery service. Try again in a moment."
- A Retry button.
The Upload tab is unaffected (it's local file processing).
Connecting ReachStream
ReachStream powers the B2B discovery backend. To connect it:
- Go to Settings → Integrations → ReachStream
- Click Connect or Add API Key
- Copy your ReachStream API key from your ReachStream account
- Paste the API key into the integration field
- Click Save
Once connected, the Find Leads tab will use your ReachStream account for B2B searches. You can verify the connection status in Settings → Integrations — it will show Connected with a green indicator.
If you don't have a ReachStream API key yet, sign up at reachstream.com and generate one from your account dashboard.
Frequently Asked Questions
Q: How fresh is the B2B data? A: ReachStream operates on a roughly 45-day refresh cycle using a 7-step verification process to validate and update its database. Previously downloaded records also receive free automatic contact updates every three months to help keep your prospect lists accurate.
Q: Can I export a CSV of just the selected leads? A: Yes — the CSV download includes only the currently selected rows if you have any selected.
Q: How many leads can I add to a project at once? A: There's no hard limit. Adding thousands is supported; the UI shows a progress indicator.
Q: Can I undo an Add To? A: Not directly. Open the project's Customers tab and remove the rows manually. The worker can also do this in chat: "Remove the last 5 customers I added."
Q: What happens to leads I don't select? A: They're discarded when you navigate away from the panel (unless cached in localStorage). They are not saved to any project.
Q: Can I save a search to re-run later? A: Not in the current UI. You can ask the worker to remember a search and re-run it on demand.
Q: Does Find Leads cost AI credits? A: No. Searches don't consume AI credits. Only the worker using the search in chat consumes credits.
Q: Is there a per-month lead-search limit? A: No hard cap, but abusive usage (thousands of searches/hour) may be rate-limited at the edge.